I don’t want to tell you that you’re doing it wrong…
But… you might be doing it wrong... I was.
Unless you’ve been in the Military or were smarter than me and just figured it out…
You may not be securing your MOLLE gear to the webbing on your base MOLLE pack, vest, or range bag as securely as you could be…
In other words, if you’re simply placing the attachment strap through the webbing or you aren’t using an interlocking weave securing both items together…
You’re not doing it right…
Which means in the field, your accessories will be shaking around on your MOLLE pouch or vest more than they should, there’s a greater chance of getting snagged on something, and you're wasting energy not having your tactical gear as compact and stable as it could be.
The good news, I can show you how to look like you know what you’re doing in less than 60 seconds.
Which is where this post comes in…
In this post, I’m going to show you how to properly (read: securely) attach your MOLLE components to MOLLE webbing on your utility pouch or military backpack so you’re getting the most out of your MOLLE gear.
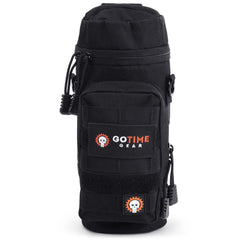
So grab your bug out bag and any of your MOLLE compatible pouches like your MOLLE Water Bottle Pouch and let’s walk through this together real quick.
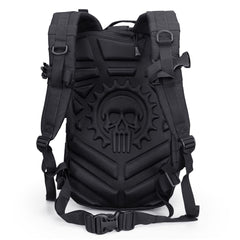
Exo-Tek™ 24 Tactical Backpack and Exo-Tek™ H2O Water Pouch
Before you can clip anything, you need to take a few seconds and plan where on your MOLLE pack you’re going to add your attachment.
The size, weight, and how often you need to access what you’re attaching will dictate where you place your attachment on utility pouches... so plan accordingly.
One clue you can use to help guide you where you want to attach your tactical gear is the length of your attachment straps.

Most small/medium size components are designed to attach to two or three rows of webbing.
Now, if you don’t have the perfect number of rows available it’s not the end of the world…
You can still attach your item, it just won’t be as secure as it could be and will add some extra stress to the webbing rows you are using.
So just be smart about it.
Here, you can see mine is the perfect length to attach to three rows of MOLLE webbing.
Once you’ve selected where you’re going to attach your MOLLE component, it’s time to attach it.
Start by inserting each attachment strap through the top row of webbing you’re going to use.

Pull the attachment straps all the way through securing the pouch to the top row of webbing.

Now for the part I used to get wrong…
We’re going to weave the attachment straps back onto the MOLLE webbing back onto the accessory pouch we’re attaching.
Rather than just sliding the attachment strap through as many rows of webbing as you can…
You’re going to weave the attachment strap back through the webbing on your MOLLE accessory pouch.

Run both attachment points through the MOLLE webbing on the accessory pouch and pull them all the way through for a secure fit…

And now you’re doing it right!
Depending on the size of MOLLE attachment you’re securing, you’re going to continue this pattern until you reach the end of the attachment straps.

In this example, I’m attaching my MOLLE Water Bottle Pouch to my EXO-TEK 24 bug out backpack. As I said earlier, this pouch perfectly secures to three rows of MOLLE webbing.
So I’m going to weave the attachment straps back through my tactical backpack, then back through the MOLLE water pouch two more times until I’ve reached the end of the attachment straps.

Once you’ve woven the attachment points all the way through the MOLLE webbing on the pack you’re attaching your accessory pouch and the webbing on the accessory pouch, the last step is to secure the snaps so your pouch won't go anywhere.

Give your pouch a shake and feel how much less movement and how much more secure the attachment is to your MOLLE bag.
When woven properly, the accessories you clip almost feel like they are built right into your MOLLE backpack.

When woven properly, the accessories you attach almost feel like they are built right into your MOLLE backpack.
If you’re like me…
You didn’t quite figure out you were supposed to weave the attachment straps through the MOLLE webbing on both the bag you’re attaching to and the piece of MOLLE compatible gear you’re attaching…
You’d think it was intuitive enough given there is MOLLE webbing on both…
But until someone showed me, I was doing it all wrong.
Not anymore :^)
And the best part…
So long as you have MOLLE spec gear, you can quickly, easily, and securely attach it all together using the weaving technique I’ve just shown you.
It’s one of the reasons I love the MOLLE platform. It’s compatible with any other brands MOLLE spec gear so you have nearly endless options to customize your pack.
And if you don’t have MOLLE spec gear…
Well, I would highly recommend getting some because it provides you with a completely modular platform you can shrink, grow, and customize for exactly your needs.
In fact, I think MOLLE compatibility is one of the most important features to have on your bug out bag.
Let me know in the comments if you have any questions about using MOLLE platform gear or if you were like me, and weren’t quite doing it right before.
Go Time Gear® stands behind everything we sell. We want to be a part of preparing you and your family which means ensuring you have confidence in every product you’re counting on when you need it. If anything in your purchase fails to meet your expectations, you can return it for a replacement or refund within 30 days. We’re confident you will love the products from Go Time Gear® and we’re willing to back it up. To process a refund, visit our support page.
Go Time Gear® uses the latest security standards and encryption technology to ensure we maintain your trust and safety when we are responsible for any of your personal information. In fact, our encryption standards are the same level that large banks use to keep your information secure. From annual on-site assessments ensuring the proper infrastructure is in place, risk management analyses and procedures, cutting edge network security, and card holder data protections in place, everything is routinely monitored and tested to ensure you have a safe and secure shopping experience.
Forget about dealing with complicated shipping policies, minimum orders, or excluded products. When you shop with Go Time Gear®, you get free U.S. standard shipping on your entire order. Every time.
No minimums. No hassles. Just free shipping.